
Block Basics
One of the more powerful but slightly confusing aspects of WordPress is its block editing system (officially known as the “Gutenberg editor.”)
Blocks are used to add content and layout posts (news stories) and pages on the site. This guide is designed to give you clearer idea on how to add and manipulate blocks when editing a page or post. Please take 5 to 10 minutes to read this guide closely and feel free to practice on a new page or post on this site. It will save you a lot of time and aggravation in the long run.
What is a block?
A block contains a piece of content. The content might be an image, a paragraph, a heading, a video, etc. There are dozens and dozens of different types of blocks, one for each type of content that can be added. You will likely only use a handful of these blocks.
Adding the first block to a new page/post using the shortcut key
When you create a new page or post, you will see something like this:
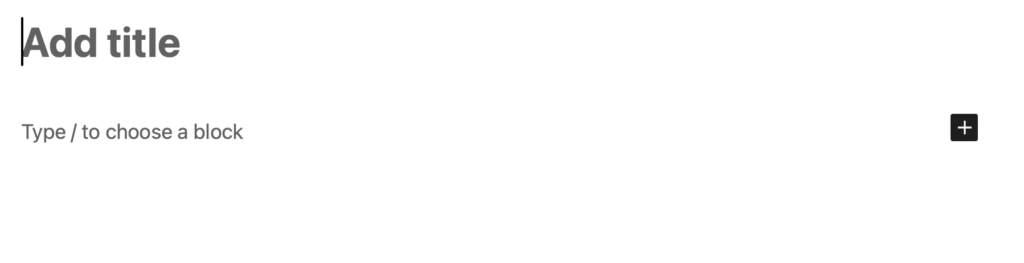
When you type in the title and then hit “enter,” your cursor will drop down into the block where it says “Type / to choose a block.” What does that mean, exactly?
Well, the “/” is a shortcut key. When you type the “/” key, a dialog will pop up for choosing a block:
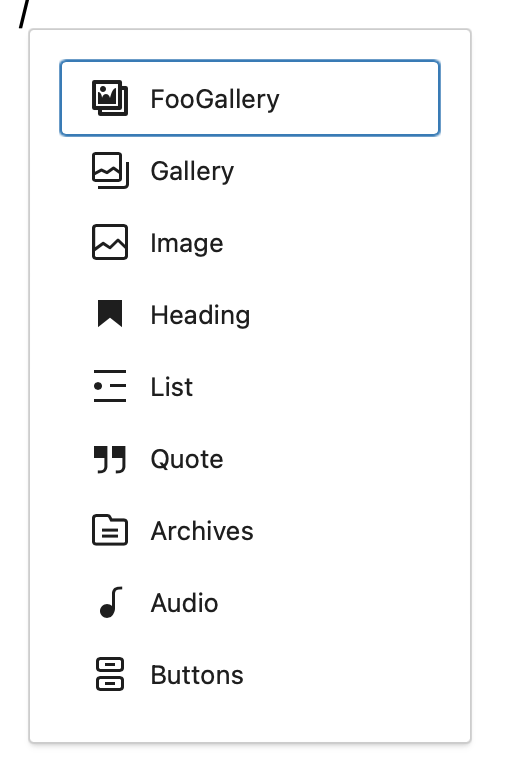
You will then see a list of your most frequently used blocks. Note the first type of block listed is highlighted. This means that if you hit the “enter” key, that type of block will be added to the page. You can also add a block type by clicking on it from the list or using the arrow keys to select the type of block you want. Once highlighted, hit “enter” on the highlighted block to insert that block type.
You can also start typing the name of the block and a search will be performed on all the different types of blocks available. For example, let’s say you’d like to add a YouTube video to the page. You just start typing in the name of the block, “you,” and a search will be performed for the name of the block with these letters:
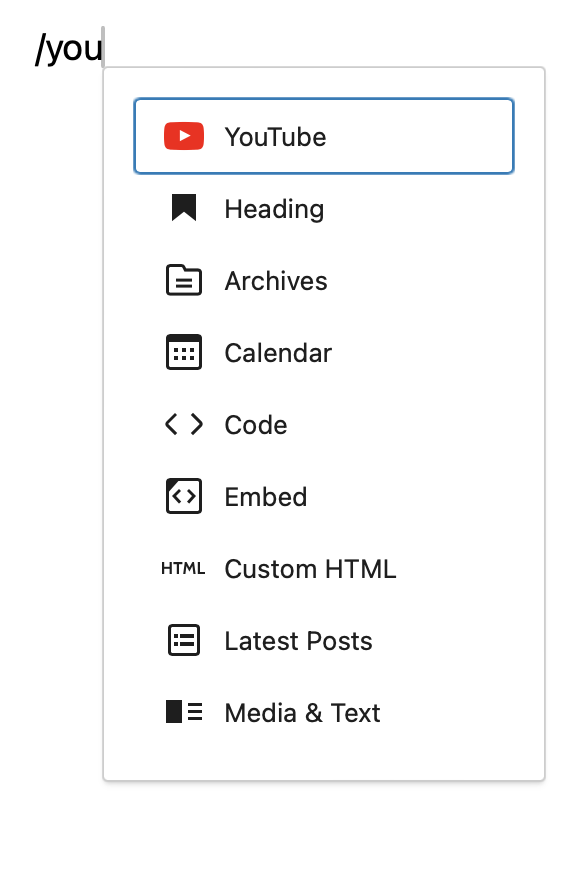
Once you find your block, click on it or highlight it with arrow and keys and hit “enter.”
Selecting a block using the “+” icon
Instead of using the shortcut key to select a block, you can click on this symbol to search for the block:

If you click on it, it will bring up a dialog for searching blocks as well:
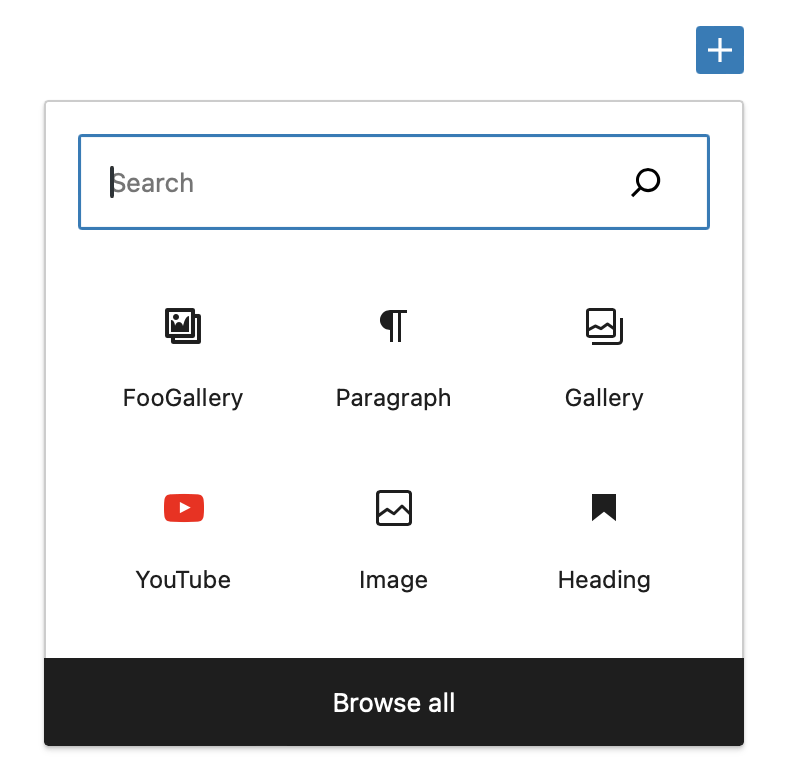
Your most frequently used blocks will show up and if you see the block you want to use, you can click on it. Otherwise, you can search for it or click “Browser all” to see a categorized listing of all the different types of blocks available on the site over on the left hand side of the page. Simply click on the block you want to use to insert it.
Inserting new blocks onto a page
OK, so now that you know how to choose a block type, let’s cover the slightly tricky procedure for adding a new block to a page.
Adding text or paragraph blocks to a page
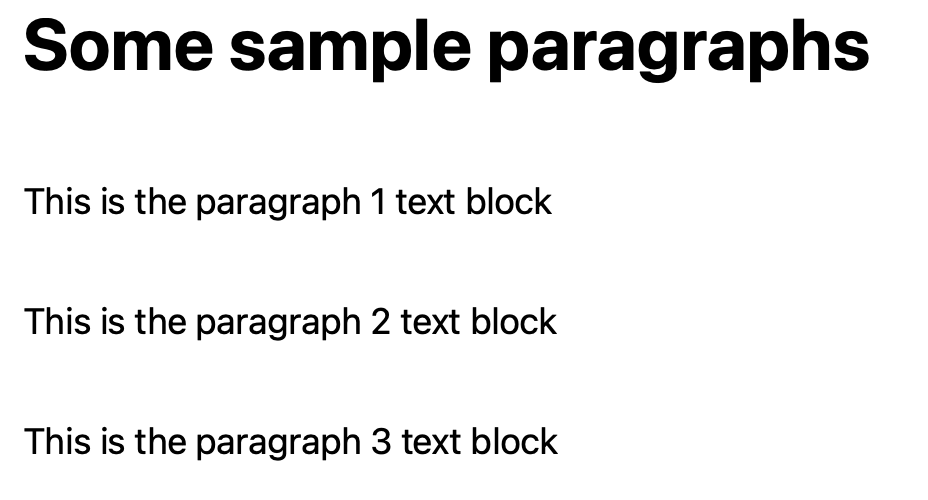
Paragraph text is the default block type. So if all you are doing is typing in paragraphs of text, you do not have to worry much about blocks. Just type in some text, hit “enter” when you are done with a paragraph, type in some more text, hit “enter” again when you are done with the paragraph, and so on. Continue until you are done entering the text. Each paragraph will now be in its own block:
Now let’s say you want to add a new paragraph between blocks 2 and 3 above. There are a few different ways to accomplish this.
First, you can click on paragraph 2, then carefully move your cursor to the end of the text in paragraph 2, and then hit “enter.” A new block will be inserted for you can you can start typing in the new block.
Another way to add the new block is to click anywhere on paragraph 2. You’ll see a little pop up menu with three dots on the right. Click on the 3 dots:
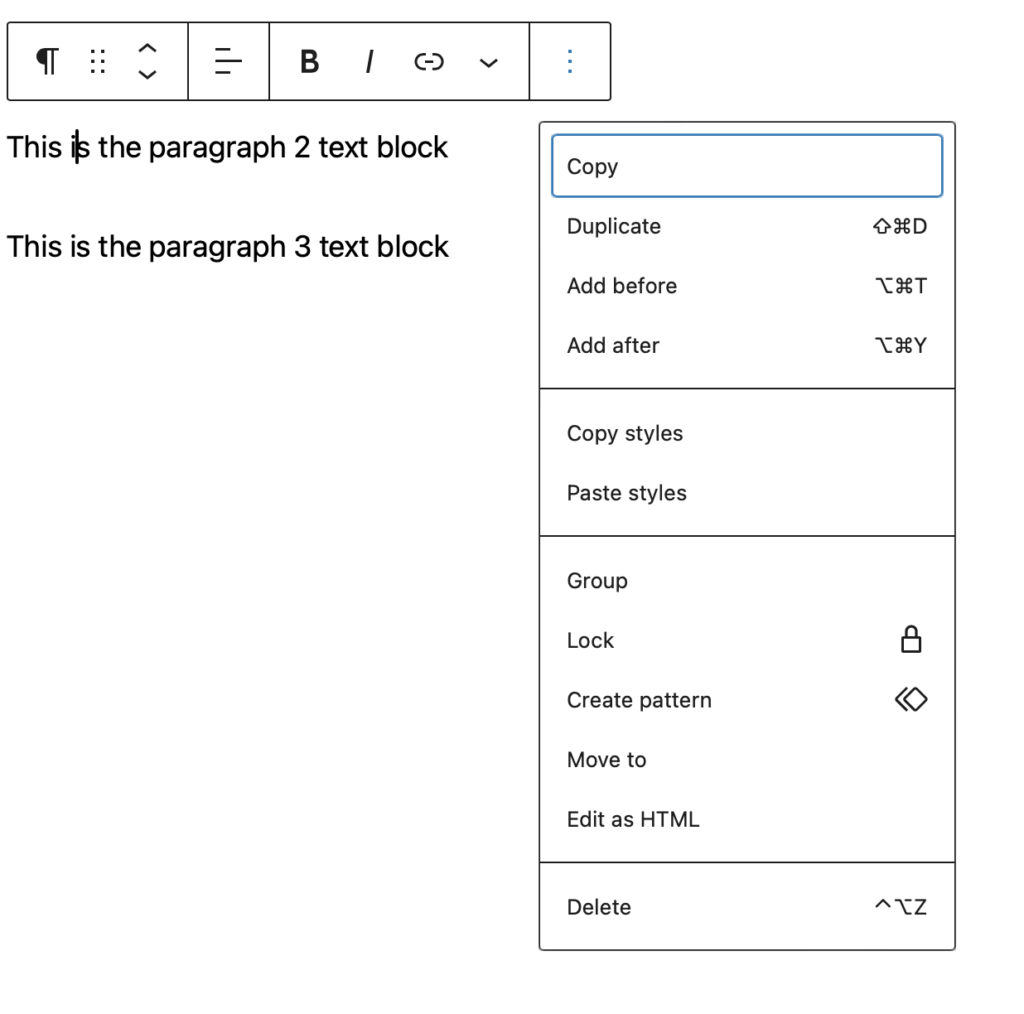
Now Look for the option called “Add after” and click on it. A new block will be inserted for you and you can add your new text in there. Also note the “Add before” option. This will add a new block before paragraph 2. For you keyboard wizards out there, note the shortcut keys for adding blocks. These shortcuts are available to you after your block has been selected using the up and down arrow keys.
Another way to add a block between existing blocks is to use your mouse to hover between existing blocks and then clicking the blue “+” sign that appears:
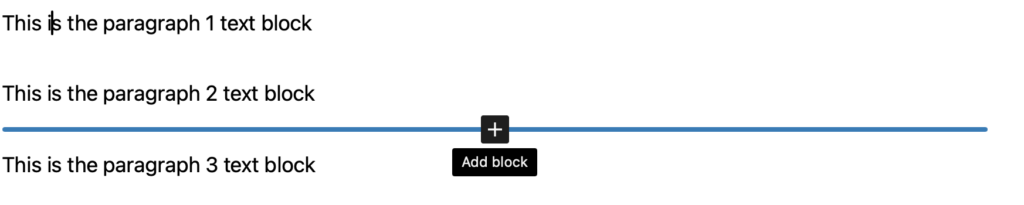
It takes a little practice to find the sweet spot between blocks that makes the “+” sign appear.
A third way to add a block after paragraph 2 is to click on it and then click the blue “+” sign in the upper left corner of the page:
This will open up a listing of all the blocks in the left column of the page. This is a great way to get an idea of all the different kinds of blocks you can choose from.
Pro tip: Viewing your blocks on the page with “List View”
It can be very helpful to turn on the “List View” so you can get a bird’s eye view of all your blocks on the page. To do that, click on the three dashed lines in the upper left part of the editor:

Once clicked, a visual representation of all the blocks on the page can be seen:
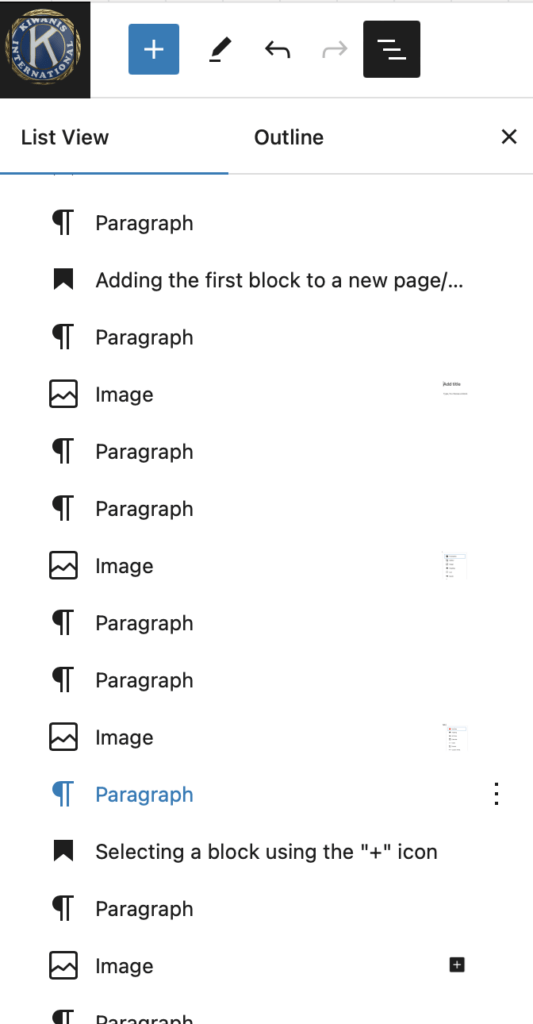
This feature is especially great for very long pages and jumping around it quickly. When you click on a block in “List View” it will automatically jump to and select that block.
Notice that after a block is selected, there are three dots on the right that can be clicked to open a menu for performing additional actions just like if you clicked the three dots that shows up above the block when you click on it directly on the page.
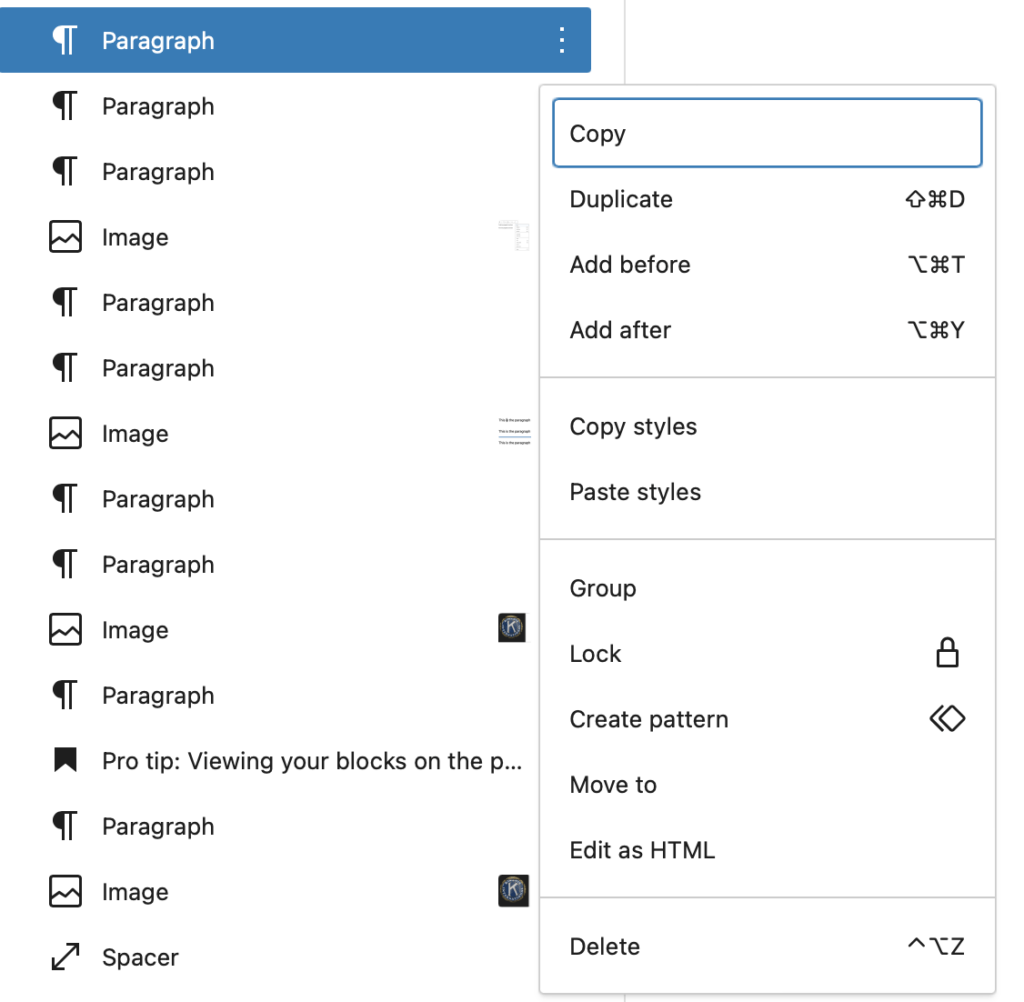
The “List View” is also the easiest and best way to rearrange your blocks on the page. Simply click a block and then drag it to move it above or below the other blocks on the page.